Showing posts with label Mobile Tricks And Tips. Show all posts

[Tutorial]Decompiling Or Editing Android's APK

How To Decompiling Or Editing Android's APK

step 1 :  first apk file rename and last .zip to create zip file.

step 2 :  then open *.zip file and classes.dex copy to dex2jar-0.0.9.9 folder.

step 3 :  then folder on shift+right aerow and click open command window here.\

step 4 :  then write on cmd in dex2jar classes.dex and enter press. this process is  given on images.

step 5 :  then getting classes_dex2jar file.

step 6 :  then open jd-gui application and open file-> open file and open classes_dex2jar file.

step 7 :  getting the code of application.


Download Software


  BY Our User::Divyang Patel

How To Update Galaxy S3 LTE I9305 with Official Jellybean 4.1.1 XXALI5 Firmware

Step 1 - Download Android 4.1.1 I9305XXALI5 for Galaxy S3 to your computer and extract the zip file. 

Step 2 - Download ODIN v1.85 which will help you to install Android 4.1.1 on Samsung Galaxy S3 I9305. 

Step 3 - Switch OFF your phone. Now go to Download Mode. How? Press and hold the Volume Down + Home buttons together, and then press the Power button till you see the construction Android robot and a triangle. Press Power again to confirm to enter into Download Mode.

Step 4 - Make sure you have your Galaxy S3 USB drivers installed on your computer.
  
Step 5 - Open ODIN on your computer. Connect your phone to your computer while your phone is in the Download Mode.
  
Step 6 - If your phone is connected successfully, one of the ID:COM boxes will turn yellow with the COM port number. This step might take some time.

Step 7 - Now select the files that you have to flash/install on your phone. These files are to be found from the extracted files in Step 1.
  • Click on ‘PDA’ and select file with ‘CODE’ in its name.
  • Click on ‘Phone’ and select file with ‘MODEM’ in its name. Ignore this step if there is no such file.
  • Click on ‘CSC’ and select file with CSC’ in its name. Ignore this step if there is no such file.
  • Click on ‘PIT’ and select the .pit file. Ignore this step if there is no such file.
Step 8 - In ODIN, check the Auto Reboot and F. Reset Time options. As for the Re-Partition optioncheck it ONLY if you selected a .PIT file in the above step.
 
Step 9 - Now click on the Start button in ODIN. Installation process will start and would take a few minutes to complete.
Step 10 - After the installation is completed, your phone will restart. After you see the home screen, unplug your phone from the computer.
That’s it. Your Samsung Galaxy S III LTE has now been updated to Android 4.1.1 build XXALI5 firmware update. Go to Settings > About phone to verify.
Hit +1 or LIKE as a thanks to us!
If you run into any problems, feel free to drop us a comment below and we will reply you back ASAP with the fix or the solution to your problem.

Samsung Galaxy S3 Secret codes For Samsung S3

*#1234# (View SW Version PDA, CSC, MODEM)
*#0*# (General Test Mode)
*#12580369# (SW & HW Info)
*#197328640# (Service Mode)*#1234# (View SW Version PDA, CSC, MODEM)
*#0*# (General Test Mode)
*#12580369# (SW & HW Info)
*#197328640# (Service Mode)
*#0228# (ADC Reading)
*#32489# (Ciphering Info)
*#232337# (Bluetooth Address)
*#232331# (Bluetooth Test Mode)
*#232338# (WLAN MAC Address)
*#232339# (WLAN Test Mode)
*#0842# (Vibra Motor Test Mode)
*#0782# (Real Time Clock Test)
*#0673# (Audio Test Mode)
*#2263# (RF Band Selection)
*#9090# (Diagnostic ConfiguratioN)
*#7284# (USB I2C Mode Control)
*#872564# (USB Logging Control)
*#4238378# (GCF Configuration)
*#0283# (Audio Loopback Control)
*#1575# (GPS Control Menu)
*#3214789650# (LBS Test Mode)
*#745# (RIL Dump Menu)
*#746# (Debug Dump Menu)
*#9900# (System Dump Mode)
*#44336# (Sofware Version Info)
*#7780# (Factory Reset)
*27673855# (Full Factory Reset)
*#0289# (Melody Test Mode)
*#2663# (TSP / TSK firmware update)
*#03# (NAND Flash S/N)
*#0589# (Light Sensor Test Mode)
*#0588# (Proximity Sensor Test Mode)
*#2732832553282*# (Data Create Menu)
*#273283255663282*# (Data Create SD Card)
*#3282727336*# (Data Usage Status)
*#7594# (Remap Shutdown to End Call TSK)
*#34971539# (Camera Firmware Update)
*#526# (WLAN Engineering Mode)
*#528# (WLAN Engineering Mode)
*#7412365# (Camera Firmware Menu)
*#80# (Unknown)
*#07# (Test History)
*#3214789# (GCF Mode Status)
*#272886# (Auto Answer Selection)
*#8736364# (OTA Update Menu)
*#301279# (HSDPA/HSUPA Control Menu)
*#7353# (Quick Test Menu)
*27674387264636# (Sellout SMS / PCODE view)
*#7465625# (View Phone Lock Status)
*7465625638*# (Configure Network Lock MCC/MNC)
#7465625638*# (Insert Network Lock Keycode)
*7465625782*# (Configure Network Lock NSP)
#7465625782*# (Insert Partitial Network Lock Keycode)
*746562577*# (Insert Network Lock Keycode SP)
#746562577*# (Insert Operator Lock Keycode)
*746562527*# (Insert Network Lock Keycode NSP/CP)
#746562527*# (Insert Content Provider Keycode)
*#272imei#* Product code

*#0228# (ADC Reading)
*#32489# (Ciphering Info)
*#232337# (Bluetooth Address)
*#232331# (Bluetooth Test Mode)
*#232338# (WLAN MAC Address)
*#232339# (WLAN Test Mode)
*#0842# (Vibra Motor Test Mode)
*#0782# (Real Time Clock Test)
*#0673# (Audio Test Mode)
*#2263# (RF Band Selection)
*#9090# (Diagnostic ConfiguratioN)
*#7284# (USB I2C Mode Control)
*#872564# (USB Logging Control)
*#4238378# (GCF Configuration)
*#0283# (Audio Loopback Control)
*#1575# (GPS Control Menu)
*#3214789650# (LBS Test Mode)
*#745# (RIL Dump Menu)
*#746# (Debug Dump Menu)
*#9900# (System Dump Mode)
*#44336# (Sofware Version Info)
*#7780# (Factory Reset)
*27673855# (Full Factory Reset)
*#0289# (Melody Test Mode)
*#2663# (TSP / TSK firmware update)
*#03# (NAND Flash S/N)
*#0589# (Light Sensor Test Mode)
*#0588# (Proximity Sensor Test Mode)
*#2732832553282*# (Data Create Menu)
*#273283255663282*# (Data Create SD Card)
*#3282727336*# (Data Usage Status)
*#7594# (Remap Shutdown to End Call TSK)
*#34971539# (Camera Firmware Update)
*#526# (WLAN Engineering Mode)
*#528# (WLAN Engineering Mode)
*#7412365# (Camera Firmware Menu)
*#80# (Unknown)
*#07# (Test History)
*#3214789# (GCF Mode Status)
*#272886# (Auto Answer Selection)
*#8736364# (OTA Update Menu)
*#301279# (HSDPA/HSUPA Control Menu)
*#7353# (Quick Test Menu)
*27674387264636# (Sellout SMS / PCODE view)
*#7465625# (View Phone Lock Status)
*7465625638*# (Configure Network Lock MCC/MNC)
#7465625638*# (Insert Network Lock Keycode)
*7465625782*# (Configure Network Lock NSP)
#7465625782*# (Insert Partitial Network Lock Keycode)
*746562577*# (Insert Network Lock Keycode SP)
#746562577*# (Insert Operator Lock Keycode)
*746562527*# (Insert Network Lock Keycode NSP/CP)
#746562527*# (Insert Content Provider Keycode)
*#272imei#* Product code

Among all those 58 key codes, there is one which is very important for every new owners of SGS3. That key is *#0*# which is a general test to find out basic current state of phone’s LCD. We knew that LCD is the most important aspect of a touch-based smartphone. Anyway, just give it a try

Jailbreak iOS 5.1.1 Using Absinthe 2.0 For iPhone

the iOS 5.1.1 untethered jailbreak has just been released and Absinthe 2.0 is ready to be downloaded! Head inside for the full step-by-step guide on how to jailbreak your idevice on iOS 5.1.1 using Absinthe 2.0:


Step 1: Download Absinthe 2.0 here (MacWindows)

Step 2: Run Absinthe 2.0.

Step 3: Connect your idevice to your computer running Absinthe, and make sure that Absinthe detects the exact device that you connect. You will also need to make sure your device is turned on and in the homescreen. You will not need to enter DFU mode at all.

Step 4: Click Jailbreak, and let it complete. Your device will look like it’s restoring, this is normal.

Step 5: After the process is complete, you will get an alert from Absinthe saying that the jailbreak is complete. You can no unplug your idevice. Congratulations, your device is no jailbroken!

For more like this:::TheMobiForest

Android 4.0.3 + Sense 3.6 MOD ROM For Android


This ROM is based on HTC S710d RUU v4.08.1401.5 with the newest Google Apps & ROOT.

Language: Chinese, English
Android : 4.0.3
Sense: 3.6
Radio: 1.23.30.0509
Hboot: 1.11
Kernel : 3.0.16 (HTC Offical)


This is an improve version of a stock with full Sense 3.6 Interface.
Very fast, Clean, Stable.


Features:

1. Support GSM + WCDMA + CDMA 1x + EVDO, and auto detect network
2. Add Google Apps (optional)
3. Rooted
4. All China Telecom bloat removed
5. Fix bug with People


MOD EDIT:.VERIZON INC2 USERS DO NOT FLASH THESES RUU, IT BREAKS DATA CONNECTION IT CAN'T BE FIXED BY FLASHING TO STOCK


How to flash?

If you are Verizon user, please don't updare pri to 2.71, the pri is in package 1.


!!! Your phone had to be S-OFF first !!!

1. Download PG32IMG-VIVO-CT-ICS-35-S-HTCCN-CHS-CT-4.08.1401.5-v201206050211-signed.zip, rename to PG32IMG.zip then flash in the bootloader. (It's necessary.)

. Tip: If you have updated your Hboot 1.11, Radio 1.23.30.0509. You can skip this step.


2. Download ROM-VIVO-CT-ICS-35-S-HTCCN-CHS-CT-4.08.1401.5-v201206050211-signed.zip, then flash it with Recovery (Suggest 4EXT Recovery)


3. Download OTA_gapps-ics-20120429_v201206050210_signed.zip, then flash it with Recovery. This is optional.

4. Enjoy!


To Verizon INC2 Vivow Users,


* Do Not Flash These!!! For Vivow_ct users and developers ONLY!!!!


Download:

Tips: For those who have problem to download, just click on the green button to start download.

PG32IMG_VIVO_CT_ICS_35_S_HTCCN_CHS_CT_4.08.1401.5_ v201206050211_signed.zip
http://115.com/file/aneytzy2#PG32IMG...211-signed.zip
MD5: 43825E1E6642ADBAAE1ED11BC19FD85F
SHA1: 48C3555172079F79F60392F98588D2DED4226ED5
CRC32: C3D865E8


ROM_VIVO_CT_ICS_35_S_HTCCN_CHS_CT_4.08.1401.5_v201 206050211_signed.zip
http://115.com/file/aneytn0f#ROM-VIV...211-signed.zip
MD5: 927ACAAC830BBE9F60912DB9BD422500
SHA1: B094CBF26951AE37DD37BF14632F592022D883D7
CRC32: 07994477


OTA_gapps-ics-20120429_v201206050210_signed.zip
http://115.com/file/e7ivwoc3#OTA-gap...210-signed.zip
MD5: A4D39B81AA7F9C41E7374759654CE64C
SHA1: C95356003F18DD2971034AD5D98AAE436BB9BF81
CRC32: 346B0146


Mirror downloads (Thanks to MAXIMATOR at #22 floor):

OTA_gapps-ics-20120429_v201206050210_signed.zip

PG32IMG_VIVO_CT_ICS_35_S_HTCCN_CHS_CT_4.08.1401.5_ v201206050211_signed.zip

ROM_VIVO_CT_ICS_35_S_HTCCN_CHS_CT_4.08.1401.5_v201 206050211_signed.zip

Samsung Galaxy S3 ROM Pre-released DOWNLOAD


Only yesterday, wickedly skilled developer Chainfire rooted the S3 before it is released. Today, the Samsung obsessed boys over at SamMobile received a leaked ROM containing all the goodies packed into the upcoming Galaxy S3. Yes, you read it right, a full Android 4.0.4 ROM with the latest iteration of TouchWiz featured on the Galaxy S3 is here!

So, if you’re looking for a way to test or simply use the S3′s TouchWiz interface even before the device itself is released, this is your chance.

Note: this ROM will only work if your device has Android 4.0 ICS, initial reports say

The leaked ROM of the Galaxy S3 that has trickled its way onto XDA’s forum gives you the experience of having Samsung’s latest flagship phone in your hand – way earlier than those 9 million (possibly more now) people who have pre-ordered the much anticipated Android device.

S-Voice, Smart Stay and Pop Up Play are only some of the pretty amazing features of the S III. S-Voice is a Siri-style virtual assistant on your Android phone. With your voice, you can control your device by saying commands like launching the camera, controlling songs, adjusting volumes and you can even yell ‘snooze’ to your S III’s alarm if you want it to go away for a while.
Other features baked into the latest version of TouchWiz is ‘Pop Up Play’, which is a brand new feature from Samsung. It lets you watch HD videos while checking your email or simply chatting with your friends via SMS.

So, if you’re feeling adventurous, and want to grab a taste of the Galaxy S3′s full ROM, you can download the ridiculously large file (768MB) here. But, if you’re only looking for the APK of the S-Voice feature, you can download it below. Initial reports are indicating that Samsung’s cloud is quite selective, and will only work with Samsung devices. Still – worth a try though! Let us know how it goes. We’ve got the downloads coming in one of our team members Galaxy Nexus, so stay tuned for the full ROM review soon!


S Voice APK
It’s great to see the S3′s features leaked to other Android smartphone with this leaked ROM. The Galaxy Unpacked event in London marked Samsung’s first foray into focusing on the more human elements of technology. Most of their announcements have been full on spec hype-fests, but this time around, it was different. 

Soon though friend soon – we will have a Galaxy S3 of our own to play with and love, but for now, this ROM is just an appetizer to the feast that is to come in 10 days from now!.......

Are you going to be giving the S3 ROM a try? How about S Voice? Let us know down below!

Android Secret Codes

Android secret codes and hacks are fun and even useful if you need to troubleshoot some problems on your phone, but they are not as impressive at most other phones since the phones can already do pretty much everything but there are still some codes which are not always general knowledge. Obviously these codes are not really secret and don't do anything amazing but since people commonly refer to them as secret codes it seems fair for me to do the same.

Entering these codes on android devices should work regardless of the hardware platform.
Code Function Description
*#06# IMEI Standard IMEI command if you are trying to find out what your Android devices IMEI number is
*#*#4636#*#* Testing Mode - Phone Setting Displays the hidden testing menu for android which provides details on application usage, battery health and status, Wifi information and general network information. If you suspect that you battery is giving problems this is the best place to check.  You can also force certain network choices here, for example if you wanted to force your Android t use only 3G or GSM you could do it from the Phone Info menu
*#*#7262626#*#* Field Test Not supported by all units, will display a list of options for you to test and there is an option to log the information as well.
**05*<PUK Code>*<enter a new pin>*<confirm the new pin># PUK unlock If you need to unlock you android phone this command can be run from the emergency calling screen , you will of course need your PUK code which you came with your Sim card alternatively contact your service provider to obtain the code
*#*#8351#*#* Dialer Log Enabled Records your last 20 calls and stores them on your phone, you can find the data in the following /data/data/com.android.voicedialer/app_logdir
*#*#8350#*#* Dialer Log Disabled Disables the above mentioned call logging

The future of CyanogenMod 7 detailed, CM 7.2 to come soon, 5 new devices to get it!

Android’s Ice Cream Sandwich is all that everybody talks about right now and each and every one of you who owns a device running an older version of the OS is craving a scoop of tasty ICS and its butter smooth action. CM9 is the alternate software to go for in case your phone is not on an official Android 4.0 update list, but even that’s not enough to satisfy the needs of every mobile user out there.
Fear not, though, because CyanogenMod 7, based on Android 2.3 Gingerbread, is a project that will be taken to new heights, according to an announcement made by our favorite independent developing team on their official blog.
The initial CM 7.1 release, which has been around for a few months, still has its fair share of bugs and glitches. But while the team is busier than ever with working on CM9, the devs will still be taking care of any and every problem reported on a device running CM 7.
The CM 7.2 software package, based on Android 2.3.7, is itself in the works and will be released sometime soon. However, the CyanogenMod team hasn’t mentioned any kind of timeframe for the launch, so we could be waiting for a few more months. That’s the bad news part of the report, but there is good news to mention too.
Five new devices have been added to the official list of phones supported by CM 7.2 and, while they’re not what you would call high-end or very popular gadgets, they could surely use a software update. The HTC Status (aka ChaCha), HTC Wildfire S (Marvel), LG Optimus Chic (e720), Motorola Photon (Sunfire) and Samsung Galaxy 5 (i5500) are among the “fantastic five”. Anyone who’s hesitating to upgrade from one of these phones to something newer, faster and cooler might be in for a treat soon enough.
The CyanogenMod team has also announced that the “7.x branch” of the project “will stay open, available, and active beyond 7.2”, which is great news for anyone who owns an older smartphone that is still not on any update lists. “We aren’t just leaving you behind” said Ciwrl from CyanogenMod, a message for any Android veteran fearful of being left in the dark with an old phone running glitchy software.
Head on to the source link to check out the full CM blog post, with all the details surrounding the Gingerbread-based CyanogenMod 7’s future and tell us if you’ve tried the 7.1 software, what you think of it, and if you’re eager to check out the 7.2 version, as well as other future ROMs from the developing team!

Early benchmarks show Samsung Galaxy S3 leading the pack in battery life. One X left in the dust

Still doubting that the battery inside the Samsung Galaxy S3 will have enough juice to comfortably run the flagship phone’s 4.8-inch SUPER AMOLED HD screen and quad-core processor? We have some good news for you, then. According to battery benchmark tests, Samsung Galaxy S3’s 2,100mAh battery won’t disappoint at all.
First, we’d like to turn your attention to one rather non-scientific evidence from blogger Eldar Murtazin, who recently posted a screenshot of his Samsung Galaxy S3’s battery usage. The phone’s battery was shown to still be 42% full, even after Murtazin supposedly used the phone for over 20 hours. According to him, he listened to music for five hours on the phone, amongst other multimedia usages, and used it on a 3G network for an hour, before making the switch to a WiFi connection.
Galaxy S3 battery test murtazin
The next set of proofs comes from the folks at GSM Arena, who have just concluded their own battery benchmark tests for the Samsung Galaxy S3.
On the 3G talk time test, which measures how long the phone can be used to talk on a single charge, Samsung Galaxy S3 lasted 10 hours and 20 minutes. This was good enough to beat Galaxy S2’s 8 hours and 35 minutes, as well as competitors like the HTC One X, which clocked close 9 hours and 57 minutes. Motorola Droid Razr Maxx and its monster-size battery lasted 20 hours and 24 minutes.

The Samsung Galaxy S3’s SUPER AMOLED HD screen is proven to be quite detrimental for web browsing, but it still performed admirably. The phone lasted 5 hours and 17 minutes in the web browsing test, a good one hour more than HTC One X’s performance. Again, the Droid Razr Maxx was king with 7 hours and 23 minutes.

Who doesn’t love to catch up on their favorite TV series while on the road or to avoid awkward conversations during lunch break? You’ll be pleased to know that the Samsung Galaxy S3 managed to last 10 full hours of video playback. Though it can’t beat Droid Razr Maxx’s time of 14 hours and 17 minutes, it almost doubles HTC One X’s 5 hours and 45 minutes.

The Samsung Galaxy S3 may not be the absolute dream phone for everyone, but it’s apparent from the benchmark tests that its battery performance is something that Samsung has gotten right.

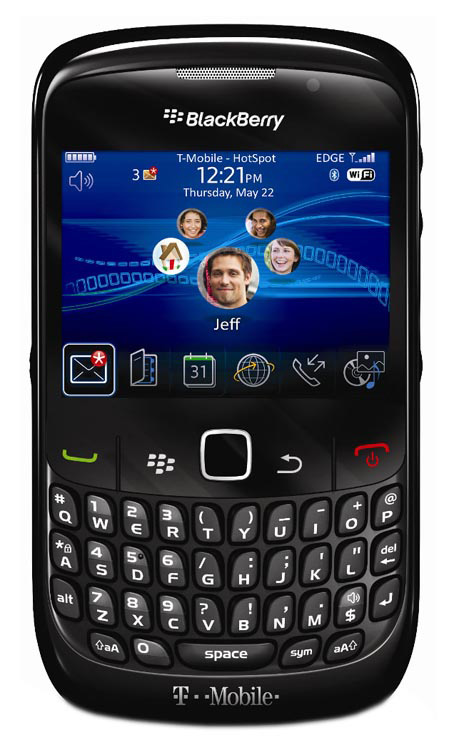
Black Berry Secret Codes

Description:-


Blackberry secret codes for hidden menus work a bit differently to all other manufacturers since you don't use the *#code# sequence but rather activate most of the codes by holding the ALT key. As always it is right to point out that these are not some magic Blackberry hacks just the codes to access the hidden menu systems which people commonly refer to as the Blackberry secret codes. To use these codes you just have to enter the key sequence as specified.


Hidden Functions (HOLD ALT)
Code Function
ALT+NMLL Changes the signal meter from the standard bars to a decibel display, entering the code again will revert back to the bars
ALT+LSHIFT+H The Techinical information menu, if you are trying to get support or help you will probably need the information displayed here
ALT+VALD Validates the address book, can only be used in the address book
ALT+RBLD Forces the address book to rebuild, can only be used in the address book
*#06# Displays the IMEI (home screen)
ALT+RBVS Used in the browser to view the page source code, useful if you are developing applications
ALT+LGLG Displays the devices event log, if you are struggling to get BES/BIS working the information here can be very useful
ALT+SHIFT+DEL Soft reset a blackberry device, this is not a format or hard reset. Just a reboot


Smart System Codes (Type these in a message box for example while composing a new e-mail)

Code Function
MYVER Displays the Software Version and Model Number of the device
LD Local Date is displayed
LT Local Time is displayed
MYSIQ Displays the device owner information
MYPIN Device PIN is displayed
Other Codes
Code Function
ALT+LEFTCAPS Displays the Language Selection Screen
LOLO Use on the Date/Time screen to display the network date and time
ALT+VIEW Displays the ID's in the messages menu
ALT+THMN Use in the themes menu to disable themes
ALT+THMD Use in the theme menu to return to the default blackberry theme
ALT+SMON Enables the simulated WLAN wizard (WLAN Menu)
ALT+SMOF Disables the simulated WLAN wizard (WLAN Menu)
BUYR Display data and voice usage, enter at the status screen (options>status)
TEST Performs a full device test, enter at the status screen (options>status)

Sim Card Shortcuts (no ALT required, found under Options>Advanced>Sim Card)

Code Function
MEP1 Enable/Disable Sim personalization
MEP2 Enable/Disable Network personalization
MEP3 Enable/Disable Network subset personalization
MEP4 Enable/Disable Service provider personalization
MEP5 Enable/Disable Corporate personalization
MEPD MEP Information Display - Shows Status
A lot of the Blackberry Secret codes are actually shortcuts to the hidden menu areas that people are simply not aware of.

How To Reset Android...!

Android Reset Procedure :
 
Reset your phone to increase storage space and speed it up:
The easy way:
Settings > SDCard > Format
Settings > Privacy > Factory Reset
The hard way:
Do a hard reset and format your phones. You will have to re-download your apps and settings.
1. HOLD power button and shut down the phone.
2. Hold HOME and RED POWER down for 25 seconds until you see a triangle with an exclamation mark in it. Keep holding it down even though the G1 logo shows up.
3. Now you can do 4 things.
Home+Back reboot system now – (Soft Reboot)
Alt+L – Toggle log text display – (Toggles between the exclamation and menu options)
Alt+S – apply sdcard:update.zip
Alt+W – Wipe data/factory reset – (Out of Box reset need to re-register.)

Done...!!!

How To Enable Auto Rotation And Landscape Mode In Your Device??

Follow These Steps Enable Auto Rotation And Landscape Mode In Your Device??

1. install game and go to game directory (like others/@@java apps@@).
2. find .jad file and open it with notepad.
3. Add following lines after this line "MIDlet-Touch-Support: TRUE"

  MIDlet-ScreenMode: ROTATE
  MIDlet-Landscape-Support: TRUE

4.Close the notepad and save the changes.

How to Unlock A BlackBerry with USB cable (via PC)


What are you need to do ?

1. A Lock BlackBerry – or no Lock BlackBerry
2. A PC with Microsoft Windows Xp/Vista 32-bit
3. An USB mini Cable < for connect BlackBerry with PC >
4. BlackBerry Desktop Manager < Software and Driver for BlackBerry >
5. BlackBerry OS < for reinstall OS after Unlock >
6. MFI Multi Loader (MML) < tool for unlock >
7. MML patch files <files need for unlock>
8. VSM files <files for change vendor ID – Boot Screen >
9. A Good Guide from good man in India<TheMobiForest>


Now what we will do ?


1. Make sure you have a BlackBerry with full or at least 50% Battery
2. Make sure you do a full data backup on your BlackBerry, If it a new one – no
need to backup
3. Remove SIM Card, turn off radio, turn off Bluetooth, turn off Wifi or any
connection on BlackBerry
4. Install BlackBerry Desktop Manager
5. Install BlackBerry OS (make sure you install the same OS with a BlackBerry
you want to unlock)
6. Install MML: Run MMLSetup.msi

7. Open My Computer. Go to C:\
8. Copy MML patch override the MML folder in C:\
 9. Copy VSM folder into MML folder (If you want to change vendot ID in next
steps)


x.    Don’t connect BlackBerry to PC now
Disconnect PC from Internet. (turn off wifi, Unplug LAN cable, …)
Turn off/ Disable any Antivirus Software, Firewall … 


 11. Go to Desktop, You will see the MFI Multiloader icon

 12. Make sure Database OFFLINE and Logging OFF

13. Uncheck Auto Start and Full erase.
 14. Connect BlackBerry to PC via USB cable

 Wait until it say PASS, Go to step 15

PASS go to next step


If it say FAIL . disconnect BlackBerry form PC, close MFI Multiloader, check
to step 10 and do try again from step 10


15. Disconnect BlackBerry form PC, Close MFI Multiloader
16. Your BlackBerry will show 1 number on screen like that.


If you want to change vendor ID (Boot screen) Go to Step 17
If not, you just want to unlock BlackBerry Go to Step 19


17. Re-Open MFI Multiloader, in Connect a device to begin… screen press
Ctrl + Alt + Shift + F12, It will show the Hidden menu (Remember Don’t
connect BlackBerry before show hidden menu)


  Connect BlackBerry to PC again, You will see BlackBerry Info


18. Now Click Load VSM


Select VMS file with vendor ID and Boot Logo you want to change to List about some vendor here...

 
I would like to list out a few vendor name with VSM# for your information , in
case you guys want to change vendor ID and carrier logo splash screen.
here we go;
 
Note: I just specify the middle 5 digits number from the VSM-xxxxx-002
format:

22058 IEND
10597 US Cellular 189
21666 Verizon
21555 Tmobile
21453 Orange
06996 roger
06431 6558 t-mobile
06570 6715 IEND TIM
06792 swisscom mobile
7172 cable & wireless
7187 9098 CSL Hong Kong
7452 movistar
7485 Telus mobility
7598 sprint
7625 orange france
8211 7105t tmobile
8343 vodafone
8346 vodafone GB
8399 8417 E-plus
8667 9199 9295 TMobile
8904 Bouygues
8916 maxis
9167 Era
9185 EIN
9378 ALLTEL
9653 Entel
9725 BT
9730 trukcell
15858 movistar
VSM-09712-002 = vendor id 179
VSM-11697-001 = vendor id 1
22215 digitel
13560 Bell 320x240
15111 15160 mobilink
15202 Bouygues
15858 movistar
11220 Vodafone IT 240x320
11222 Vodafone UK 240x320
11223 SFR 240x320
11224 Vodafone Greece 240x320
11225 Vodafone Newzealand 240x320
11226 Vodafone Iceland 240x320
11227 Vodafone ireland 240x320
11228 Vodafone_Egypt 240x320
11229 Proximus 240x320
11231 Vodafone ES 240x320
11233 Vodafone Sing (MobileOne) 240x320
11234 Vodafone Sweden 240x320
11235 Vodafone Denmark 240x320
11236 Vodafone IT 240x320 
11237 Vodafone Germany 240x320

 Example:My 8700V is Vodafone then i choice VSM-09712-002 = vendor id 179 – Sim free
with boot screen with BlackBerry Logo


Select And Open VSM


19. Close MFI Multiloader.

20. Goto C:\Program Files\Common Files\Research In Motion\AppLoader

Delete Vendor.xml

 And Open the Loader

21. Check BlackBerry Screen you will see

 850/900/1800/1900
Device in cal mode
Type ‘S’,’T’,’A’,’R’,’T’ to start
Type ‘GO’ to start
INTERACTIVE TEST
L: Led, M: Mic; V: Vib; B: Loud Speaker;G: Headset
J: Kpad Bkit
Sim: out


That mean your BlackBerry in Test Mode Or Boot Mode
Type S T A R T on screen to boot Device in Norman Mode

Now in BlackBerry screen will show No Application Linked

22. Backtop Destop with Loader open 

Next to reinstall OS to your Blackberry 

 Select Application you want to install to your BlackBerry
Or just click next, We will install it later

Finish and Wait it done, and keep waitting for BlackBerry Boot up (about 20 min)
Don’t Disconnet or Turn off your Computer
When it boot up you will see BlackBerry Logo instead of Vodafone logo (on my
8700V)

 Done, Your BlackBerry is Successful unlock / Change vendor ID

Restore your data and continue use BlackBerry with new Vendor/Boot logo If you have a problem Contact me via email:mobilehatke007@gmail.com


 Next time I will make The Guide to change BlackBerry PIN number/ IMEI number for you.

P/S: If after Unlock, Your PC cant detect BlackBerry as USB Mass Storage run the repair USB Prob tool 

Connect BlackBerry to PC and run mass storage activator.cmd with admin account on PC. After that BlackBerry will reboot and you can use USB Mass Storage. 

For More Understanding  Download This Pdf


How to Make JAVA Application Full Touch Screen

 HI, Friends today i will show you that How we can make java application as full touch screen in our touch screen enabled mobile device.

ToolS Needed :
-Application That You want Full Screen.
-One P.C .
-WinRAR software.
-Simple Text Editor.


Steps :
  1. Install WinRAR Software If You have Not Installed It.
  2. Now Right Click on Your Application File (Your Appl.jar) And Select Open With WinRAR or Double Click On File.
  3. Now It Will Show You Some Class file Some Folder And Some Images File etc.....
  4. Now Select META-INFO Folder And Select MANIFEST.MF File.
  5. Drag Out The File From Folder To Your Desktop.
  6. Open This File With Any Text Editor Software.
  7. Now Put The Following Code At The End Of The File.
  8. The Code Is "MIDLET-TOUCH-SUPPORT:TRUE"
  9. Close The File And Save.
  10. Now Again Drag This Modified File In To META-INFO Folder And Computer Will Ask You To Overwrite The File. Click Ok .
  11. It's Done. install Your New Application With Full Screen Touch Support.


F1 Pocket 2011 For Android [Apk]

F1 Pocket 2011

Quick search in whole BADA phone including memory card

Steps For Searching Tips:-
  • Just quickly double click the MENU KEY.

  • Than You Will See A Search Bar.

  • Than In It You Typing What Are You Searching.
You Will Search:-
  • installed games, mails,sm,Images

How To Flash Samsung S5230/5233 Star Mobile


Tools Needed :

  1. MultiLoader Software.
  2. Firmware Files.
  3. One PC With Windows O.S .
  4. Data Cable.
  5. Your Phone.
*Notice : Flashing Of Your Phone And Updating New Firmware Will Completely Remove Your Phone's WARRANTY , And May Crack Your Phone If Any Mistakes Happen.

 (Don't Worry Follow This Guide And Your Phone Is surly Flashed. If You having Problem Please Do Not Hesitate To Comment...)

=All Download Links Are provided At The End Of The Tutorial=

Steps :
  1. Download Required Firmware From The Link Given At The End OR Click Here.
  2. Now Download MultiLoader Here.
  3. Unrar The Flash Folder Where You can Easily Find Out.
  4. Now Remove Your Sim And Memory Card From Your Device And Make Sure That Your Battery Is Fully Charged.
  5. Open MultiLoader And Select BRCM2133.
  6. Now Select All The Files As Shown In Figure.
  7. Now plug Your Phone And Restart The Phone.
  8. Now Hold Down The VOLUME DOWN+CAMERA+POWER KEY .
  9. Your Phone Shows Download Message .
  10. Now Click On Port Search On Multiloader it Wll Shows COM No And Ready.
  11. Everything Will Be Fine If All Are Clear Up till Now. Now Click DOWNLOAD Button.
  12. The Processes Will Start And Your Phone Will Be Automatically . And You Are Ready To Use Your New Firmware.

 -Make Sure That You have Installed Samsung P.C Studio On Your P.C.

Download Links :
  1. Firmware Links
  2. [MMGJK2] full Firmware 
  3. Multiloader.

Get Rcharge Balance From Way2sms


1) To get free recharge you must be a registered member of way2sms.com.    
Way2sms user need to login to their account  

2) After login  they can see new option in page Display “Get Free Recharge” clicking 

3)  After Clicking it will show some more options like “Social ads”  in which various 10 different social ads are displayed, with option of sharing these ads to friends via social network like facebook, twitter, Orkut and LinkedIn. 

4) User need to share any of these ads to their favourite social network and when other friends or users click on your shared link you will get paid by recharge amount which depends on that ad value. But for fair usage of this service you are not allowed to share more than 2 social ads in a day. 


Note:- The minimum amount to recharge your mobile is Rs. 10

Currently users can get free recharge Service for 
  • Airtel
  • Tata Docomo
  • Bsnl 
  • vodafone 
  • reliance CDMA 
  • Reliance GSM 
  • bsnl 
  • Idea cellular 
  • Tata Indicom MTS 
  •  Loop and virgin CDMA 
Enjoy This Trick...

For More Trick::Like Us::www.facebook.com/tmfsite

Reset Google Account on Android without Deleting Data


Everyone knows Gmail as it’s the best email service provider. You can associate your Gmail ID with various others Google services like YouTube, Picasa, Flickr. As Android mobile operating system is powered by Google, it makes it easy for it to sync and stay updated on your mobile with your Google account.
It’s clearly possible that you can have as many Gmail account as possible because it’s free. Last time we did a simple trick on Accounts & Sync section of adding multiple Gmail account on your Android with impacting the other Gmail account associated with your mobile. Now we would see how to remove a Google Account on your Android and keeping your personal mobile files stay intact. A hard reset would erase files which are present on your mobile phone but this procedure would help you retain those files and unassociated with a Google account.
You need to make sure that you have installed the latest version of Gmail via the Android market apps for Gmail.


Add Multiple Gmail account on Android
(1)Tap on Menu and choose option of ‘Settings’.

(2)From the settings go to Account & Sync.


(3)Here you will see the general settings options and the manage account options. In the manage account options, you will see all the Gmail IDs associated with your phone. click on that id and you would see other services added to it for sync.


(4)You would see the option like sync contacts, sync Gmail and Sync Calender.


(5)Untick them all and then click on Sign out.


(6)Confirm the sign-out step and you are done.


Now what it does is it will automatically remove all of your messages, contacts, mails and other data on your phone associated with your ID and it will only keep the phone memory data. So this way you can remove your data easily without resetting your phone. If you want to deleted all the phone content then you can press wipe out data from your mobile phone.


Now Any Problem With This Contect Us:Admin@themobiforest.com


How To change the screen resolution In Bada...

 Guys follow these steps to Change Resolution In Java Application Or In Bada !!

  1. In Computer Open Jar/Jad File Of Application via Zip Manager Of Computer.
  2. Than Find META-INF Folder In Application.
  3. Edit META-INF  Folder.
  4. In META-INF folder Change a line code given below...
LGE-MIDlet-TargetLCD-Height: 220
LGE-MIDlet-TargetLCD-Width: 400
                                                      LGE-MIDlet-Height: 220
                                                      LGE-MIDlet-Width: 400

 Enjoy A Application To Your Mobile Resolution.

 
TheMobiForest - Ultimate Forest Of Technology © 2012-2014 | Designed by Cheap TVS, in collaboration with Vegan Breakfast, Royalty Free Images and Live Cricket Score